Two Tech Tips for Virtual Lessons using Google Classroom
- Katelyn Robey

- Apr 29, 2020
- 3 min read
Updated: Jul 18, 2020
I haven’t posted anything for quite some time. Life and navigating this new work/life/mom balance has taken all of my energy. Virtual lessons, online meetings, while parenting is no joke, as many of you are probably well aware!
While teaching virtual lessons for remote learning, I’ve learned a couple tricks that keep the lessons interactive. Interactive lessons mean more involved students! Even with these little tricks, the lessons aren’t perfect, but they’re getting better!
Teach students how to share their screen.
I assumed sharing my screen was the best and only way to allow students to see the screen during virtual lessons. It turns out that I was wrong! This tip actually came to me from a coworker, and I’ve completely jumped on board.
There are times that it is more appropriate for me to share my own screen. But, during interactive activities the student should be the one sharing their screen. This allows the teacher to see what students are and are not doing in order to provide appropriate support. It also puts the learning into the students’ hands as teachers guide when necessary.
It’s great, go try it!

This activity mimics the short vowel practice that I use often with my students. In this activity, I dictate short-vowel nonsense words. The student then clicks in the correct vowel box, and says that vowel’s sound. The student is sharing her screen as I “watch” and support/guide.

This sight word passage comes from a packet by Miss DeCarbo. She has EXCELLENT resources! Typically, students circle or highlight each sight word within the passage with a different color. I added the passage as the slides background (see below for that tip). Next, I created a bunch of boxes for students to move over the sight words they find. During our lessons, students share their screen with me. That way, they are doing the work as I guide, just like we would in class.
“Lock” items in place on the screen by setting them as a background.
This one requires a few more steps upfront. Those extra steps have proven to be helpful in the long run on interactive slides.
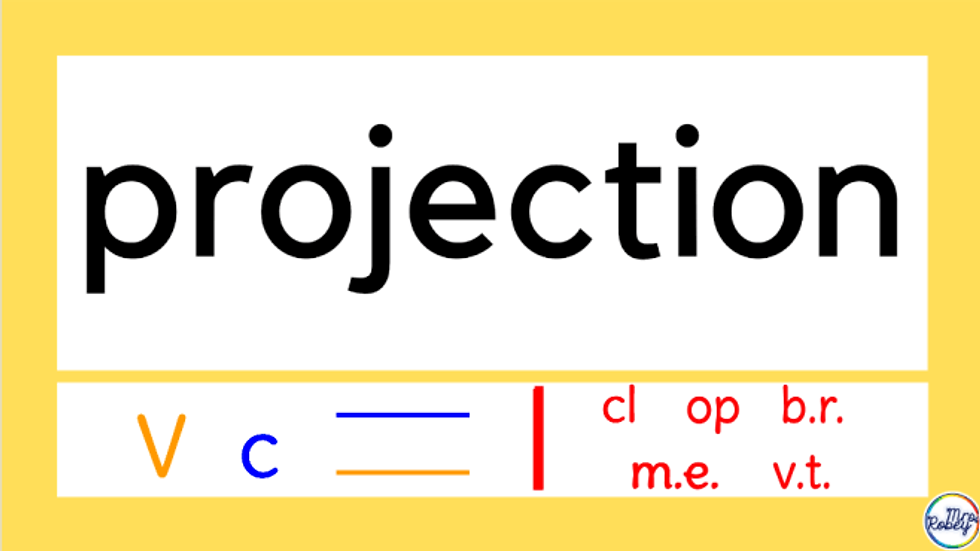
Create the non-movable part(s) of the slide. Which includes anything on a slide that you do not want students to move, resize, delete, etc. For example when I created slides for syllable division, the non-movable parts consisted of the word to be decoded and the boxes that separated the word and the decoding symbols.
Save that slide as an image. Click FILE –> DOWNLOAD –>JPG Image OR PNG Image (either one will work).
Delete everything on the slide. This is where the extra steps seem a bit silly, but it’s quick and trust me it’s worth it. Delete the content of the slide so that it is blank.
Click on BACKGROUND up on the toolbar. Click CHOOSE IMAGE, and find the slide image you just saved/downloaded in Step 2. Then click DONE.
Finish creating your slide by adding the components that students will be able to interact with or move. Whatever it is that students are DOING on the slide, this is the time to add those components.
It seems like some extra work, and it is, but it’s useful.

In this activity, students need to move the pieces or symbols at the bottom of the screen to divide the word into syllables. I do NOT want them to accidentally move or delete the word, so it’s part of the slide background. It can’t be messed with now while students decode!

It’s blurry, but this shows the syllable division practice in action during a virtual lesson. The student was moving the pieces around in order to correctly divide the syllables and decode the word.
I am certainly not getting paid for this little ad, but you should be aware that it exists. I’ve started using Canva to create some of my slide backgrounds. I have a free account and there is PLENTY available for creating nice-looking backgrounds. I choose the presentation template when creating a new project on Canva, which limits the amount of stretching that happens when I download it as an image and set it as a background in Slides.
Keep up the GREAT virtual-classroom lessons!
Those are the quick tips that have been helpful for me. As I learn more, I’ll share them!
Most importantly, teachers are doing amazing work to keep these students learning through weird, virtual lessons. KEEP IT UP!!


Comments